|
I had to get a beer and put on
some old Arlo Guthrie to get in the mood to get through this
one! I have spent hours going through the hundreds of photos
taken this cycle to make some sense of the progress of the boat.
I was feeling frustrated about the lack of progress until looking
at the photos and then realising how much actually has been done.
But which ones to select? (Twenty seven 8X10 colour glossy pictures
with circles and arrows and a paragraph on the back of each one
to be used as evidence…) There was a lot of 'wheel spinning'
going on but with two hulls at least I could keep busy on one
of them while I was pondering what to do with the other, and..
the weather was good.
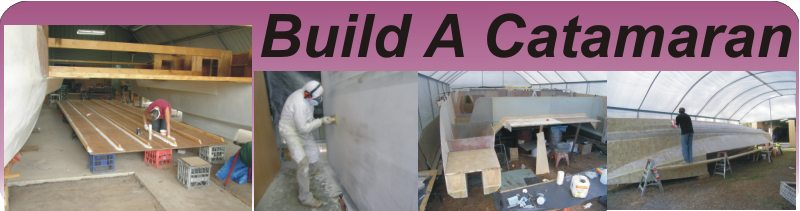
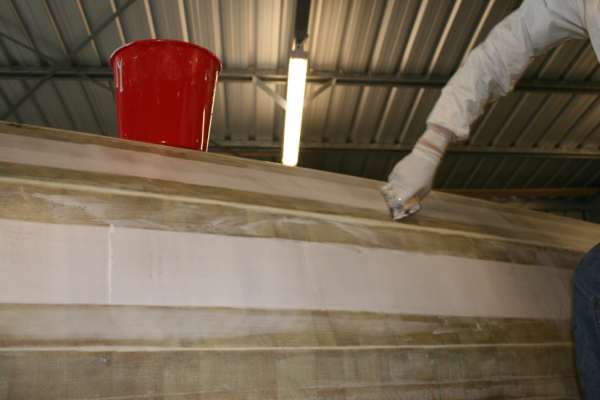
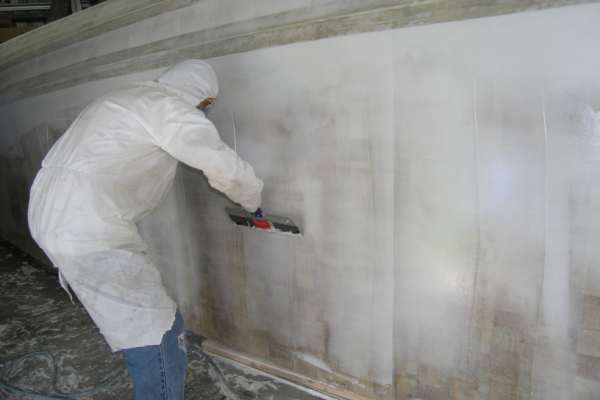
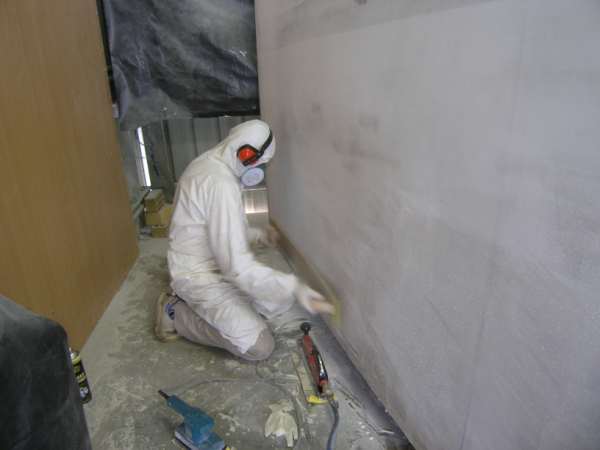
So who out there has done bogging? There
is no stage of build yet that I would call 'forgiving' but bogging
really was intimidating. Some of the consequences of getting
it wrong were apparent, excessive sanding for example, keeping
in mind I consider any kind of sanding at all an abuse of basic
human rights. Or the ugly thought of getting the mix wrong and
having to scrape off part cured muck. A million possibilities
but the little devil that got me wasn't one I thought of!
I rang up 'cat-man-do' Dave who knows
a lot about it. I had heard bad news about using "Q-cell"
bogg under the waterline but Dave said he had used it and knew
many who did successfully. I split the odds and used a "cab-o-sil"
and Q-cell mix. Dave reckoned the best way to bogg was to start
with a thicker coat and get the right contour then when it is
firming, apply a second coat of thinner mix, a 'skim coat' to
smooth the surface and fill any blemishes. That had a very sensible
ring to it!
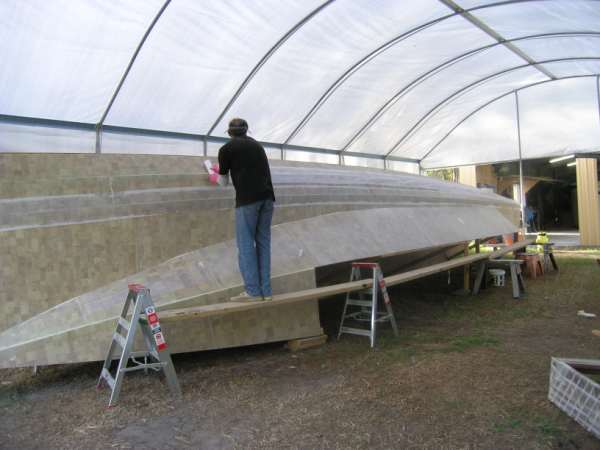
Working on the chines provides an opportunity
to take baby steps. Small areas with natural borders. I went
over the keel panel with it's entombed layer of ply for grounding
and both chines to the sheer panels. Geeez, I was impressed with
myself. Why bother sanding! When doing the first coat I had seen
some pitting as it seemed difficult to get the dry weave of the
panels to accept the bogg. No worries, that's what the skim coat
is for and indeed it seemed to work.
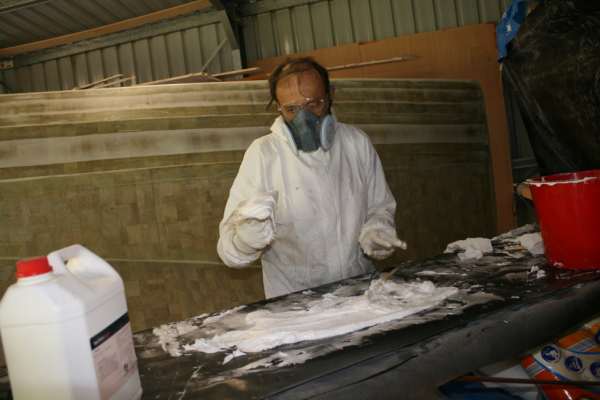
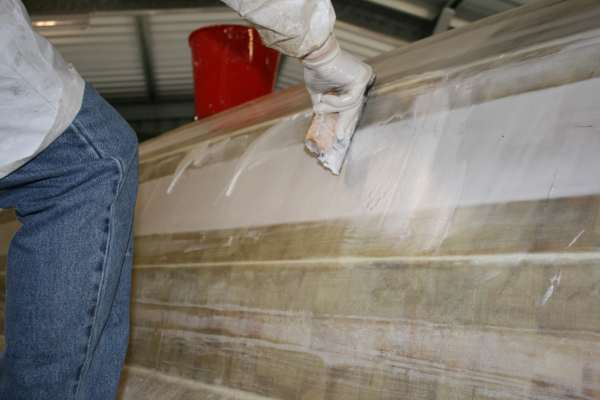
For sanding.. all I had to start was
a Makita block sander. I went over the lot with it and thought
that would do. Then a chance encounter with Super Cheap Auto's
air tool section had me find a new love… an air powered
14" in-line job!! Couldn't wait to try it!
With a savage grit lashed onto to that
thing and twice the rated air pressure I really had a good thing
going and decided the first go with the little Makita wouldn't
do after all! Amazingly I managed not to do too much damage playing
with the new toy. Got a can of brake cleaner to clean off the
oil the thing spit out occasionally though. For the finer grit
I used the little Makita after the air tool. This worked well
with the narrow and generally hidden under water parts. For the
sheer panels I figure it would be better to have a "torture
board" on hand with some 60 grit attached. Took a few minutes
to build.
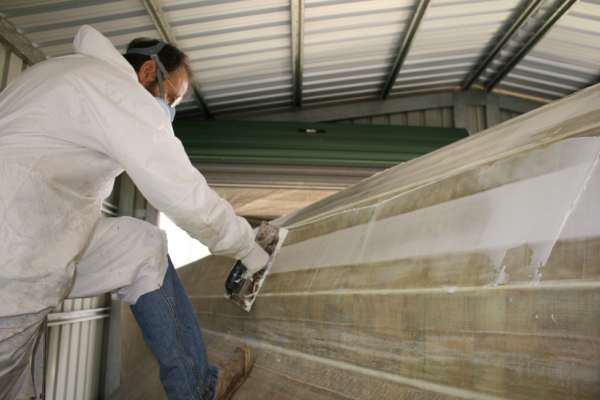
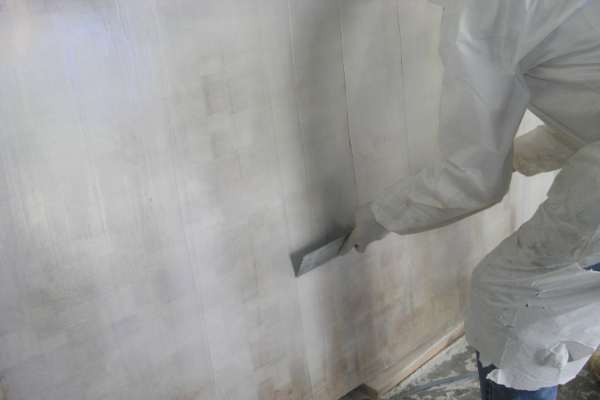
I sighted the first chine along the
sheer panels and as far as I could tell it was pretty fair. I
should have used a "fairing batten" but I hadn't read
that far in the instructions yet! Anyway, the sanding routine
worked pretty well. Air sander to take off the high spots, the
torture board with # 60 and the Makita with # 80 to smooth. I
think I did a good job on applying the bogg. The result was smooth
and reasonably fair. The panels were pretty straight, so the
result wasn't bad. Keeping in mind this was just for under the
water line fairing. What was done higher on the panels was a
light coat that will be done again when further along in assembly.
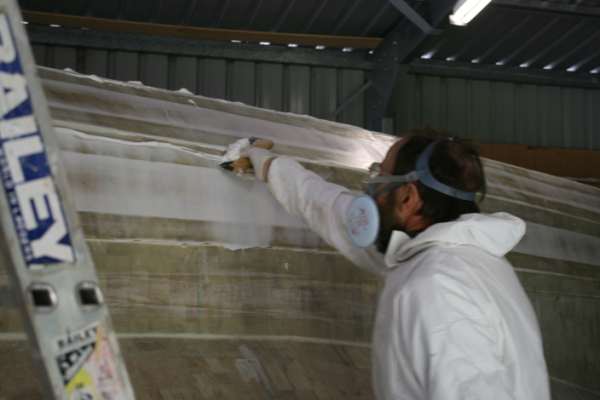
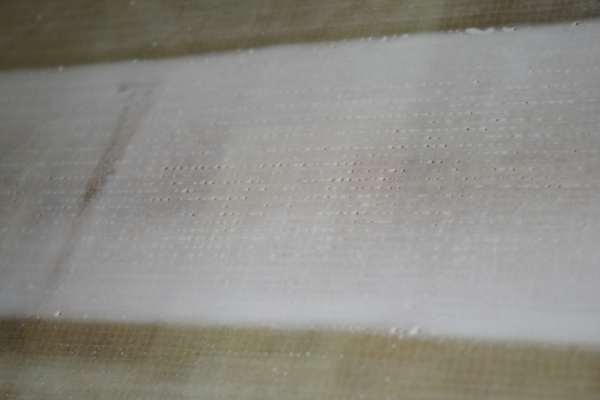
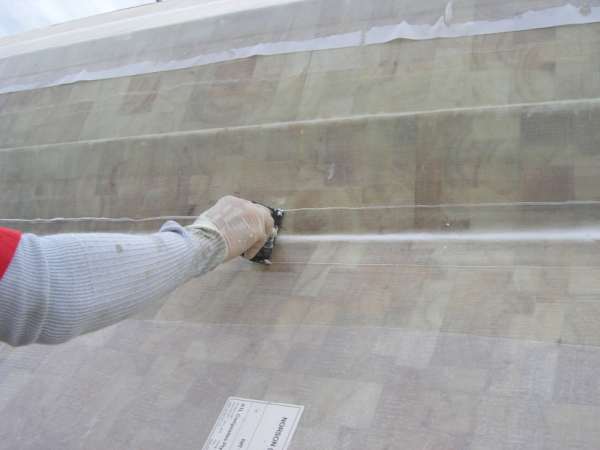
The problem was these little pits…..
Hard to see them while sanding, till
I blew off the surface with 100lbs of air. Then there were thousands
of them, singly or in clusters. Recoating with resin didn't work.
Minutes after coating it would be a hole again. I had Wattyl
fairing compound and figured it's thick epoxy filler could be
forced in to fill. But Wattyl specified the compound be applied
over primer.. so.. a complete wash down for the shed to remove
dust along with the hull itself getting a scrub.
The paint I used is one I know well. EP Universal by Wattyl is
a really good and well priced epoxy primer.
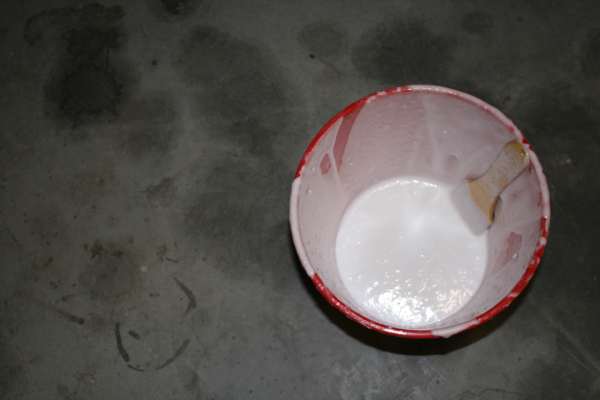
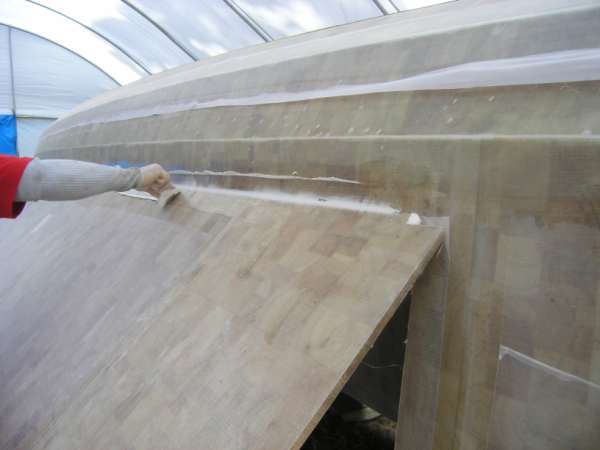
So did the compound work? Most of the
time. But often, after a quick sand, the pit would be revealed
again. GGhrrrr! But it didn't matter anyway because every time
I looked I found more. They were hard to spot so I was mixing
small batches of the stuff several times a day and sanding a
few hours later. I wasted days on that before I turned full attention
to the other hull.
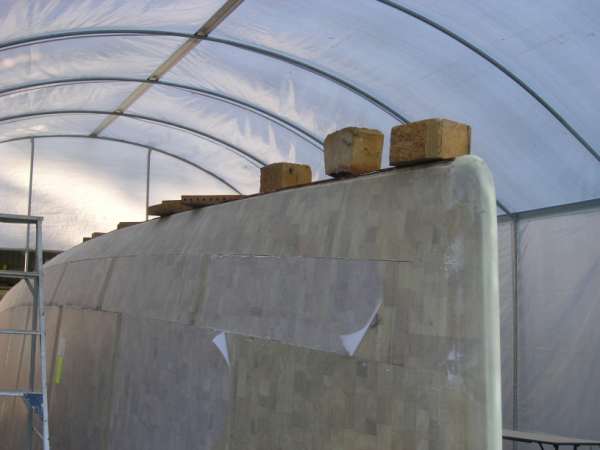
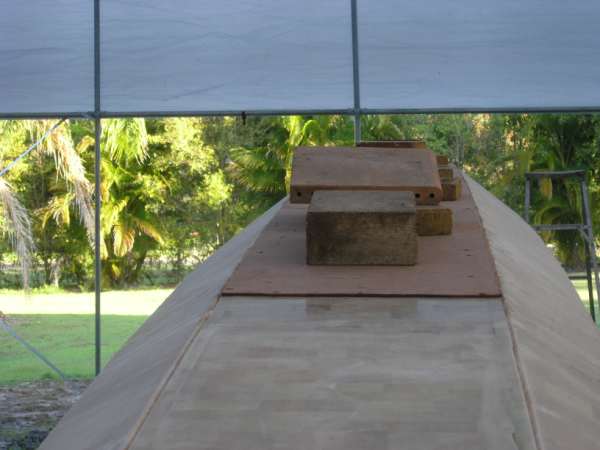
The plywood keel panel cover and taping
of the outside chines has been covered in previous instalments.
I'll only deal with the weird stuff that happened on this particular
job. Taping on the outside of the port hull I noticed "outgassing",
or the escape of expanding gasses, from some of the screw holes
that were being covered by the joints. Such was the degree of
it that I was considering if I should pull the thing off before
it set or what? I sent an email to Michelle at ATL and the phone
was ringing as I walked back into the shed! Her advise? Keep
at it and fill air pockets later with a syringe if need be. I
kept rolling the consolidator every few minutes until the stuff
finally went stiff and stopped. What a hassle! But no trapped
air. Gassing out of a screw hole that penetrated the core didn't
surprise me except this particular job was the most extreme case
I had seen.
I prepared another full length tape.
After applying it to the hull, I turned my back on it to gather
up more resin and a roller. When I came back I found the whole
lot on the ground! It was blowing a gale that day and a gust
got through the tarps, lifted an edge and stripped the thing
off. With resin going off and Kay helping to hand pick off the
debris, and amongst much creative swearing… the tape was
replaced and consolidated in and covered with peel ply….
However, there are several local flora samples encased in our
boat now.
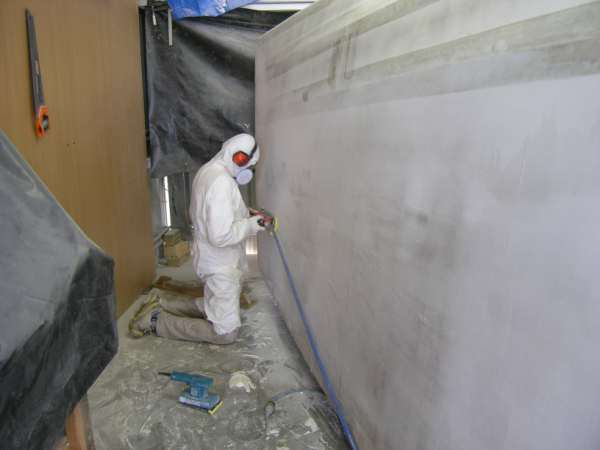
"Wet on wet" is the term for
re-coating over epoxy before the earlier coat cures. Going about
it this way makes a better mechanical bond and saves work because
when epoxy sets hard it leaves a surface contaminated with "Amine
blush", an oily or waxy residue that has to be removed,
and a surface that should be roughened for bond. As bogg will
be sanded anyway, it's efficient to build the whole thing at
once. So that is what I did… this time! I had two layers
of glass to put on the keel panel and two layers of bogg. I started
about 1400 and had to watch over the glass for gassing from the
screw holes. By the time the glass was getting firm it was going
to be late, Off to Super Cheap again.. this time for those 1000
watt work lights.. on sale for $29. The bogging started about
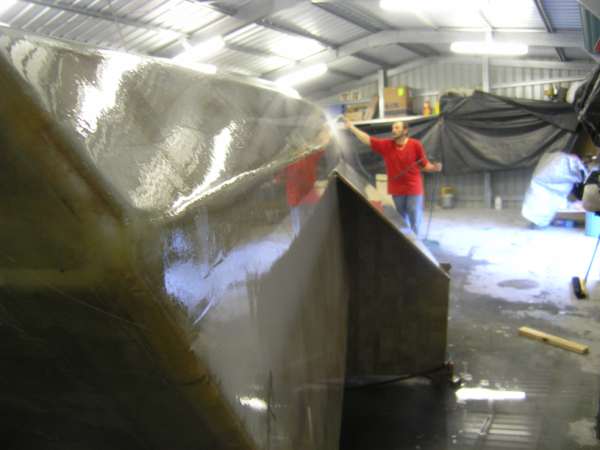
1900 and went till about 2100. Application of Peel Ply fabric
mentioned elsewhere in these reports, leaves a hardened epoxy
surface clear of blush and ready for bonding but it is a lot
of work to apply correctly and for these four layers would have
been inefficient of time and money.
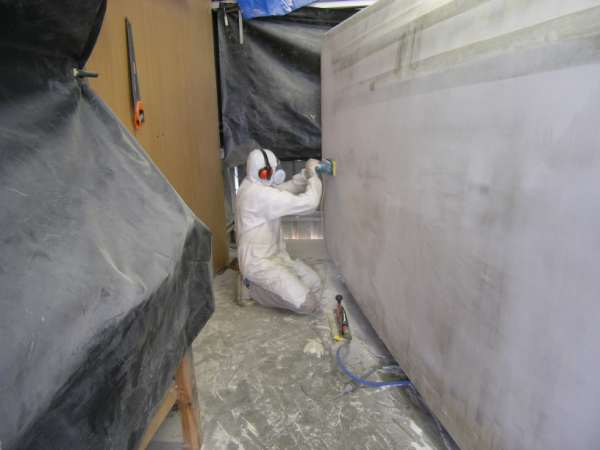
Next day the blush was so thick it would
clog sandpaper so a wash down and dry was in order but it sanded
well and showed no pits!! I credited it to the particular bogg
applying tool I had used. The "angle of attack" must
have been off before…
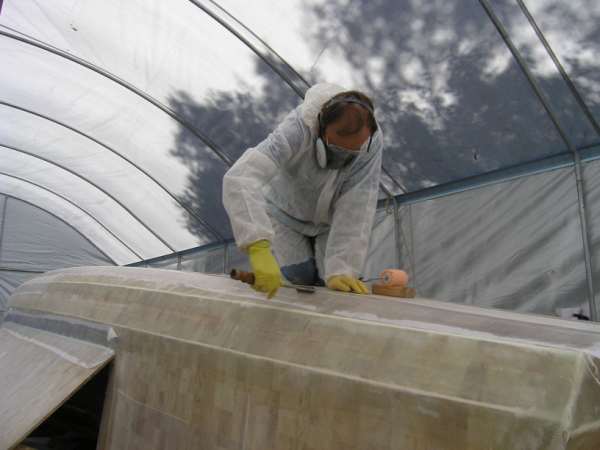
And the sander I used this time was
one picked up from Steve Halter who recently finished up his
Schionning Wilderness 13.5, "Cheetah". Steve and PJ
can lately be found making a nuisance of themselves with Cheetah
around the whits. (see the Rendezvous article this edition).
A "Rupes" brand 8" orbital…. Serious stuff!
Wouldn't want to use it on a broad flat surface.. it would look
like a mine field afterward but it sure has it's uses. With an
80 grit pad, it will put a finish sand on a hull quick smart.
So with a head full of confidence and
a heart full of ambition… the next day…
see the remaing part of this article
below the photo log below |